
In Part 1 you learned the pentatonic scale on single strings. In Part 2 you learned it on string pairs. Now we're going to connect those string-pair positions together using slides.
Why slides? Because a slide is the most natural way to shift your hand from one area of the fretboard to another without lifting off the string. Practising slides in this way does three things: it connects your positions, it adds variety to your articulation, and it strengthens your fretting hand. If you can connect any two string-pair positions with a slide, you can connect the entire fretboard.
This lesson builds directly on Part 1 (single strings) and Part 2 (string pairs). You'll get far more out of it if you've already spent some quality time with those exercises first.
The Seven-Note Pattern
The pattern we'll be working with is seven notes long, crosses three strings, and uses a slide on the lowest string to shift between two adjacent pentatonic positions.
Starting from A, the notes are:
You start on the root, and you end up one octave plus one scale degree higher. Whatever note you begin on, you'll land a predictable distance away. If you started on C (the 2nd degree), you'd end on D:
Play two notes on the lowest of the three strings, then slide up to a third note on that same string. This shifts your hand into the next position. Then play two notes on the middle string, and two notes on the highest string — seven notes total.
Here's what it looks like on the fretboard starting from A on the 6th string:
The curved arrow between the two notes on the bottom string is the slide. You fret the note, pick it, then slide your finger along the string to the next note without picking again.
The EAD String Set
Now shift the pattern to start from every note of A minor pentatonic on the 6th string, working your way up the fretboard. Here's the full run ascending.
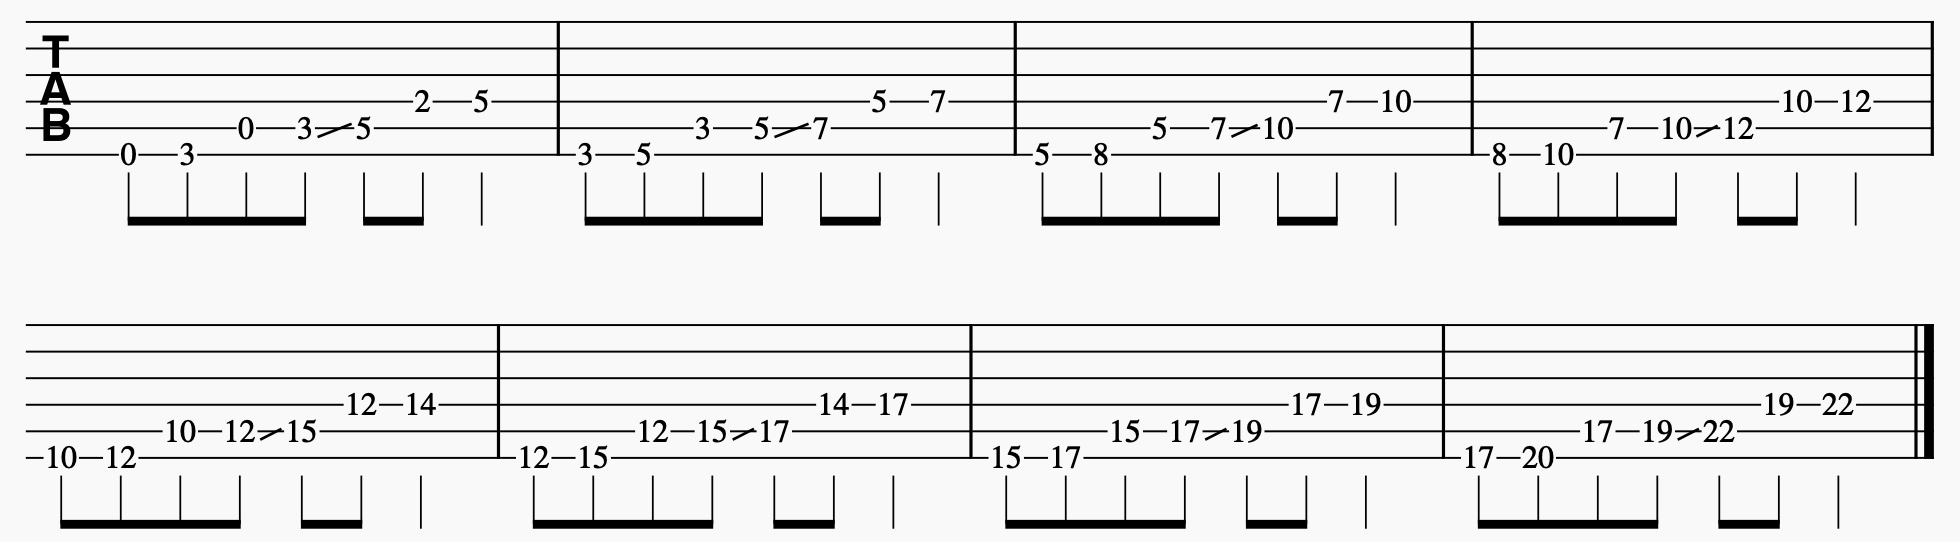
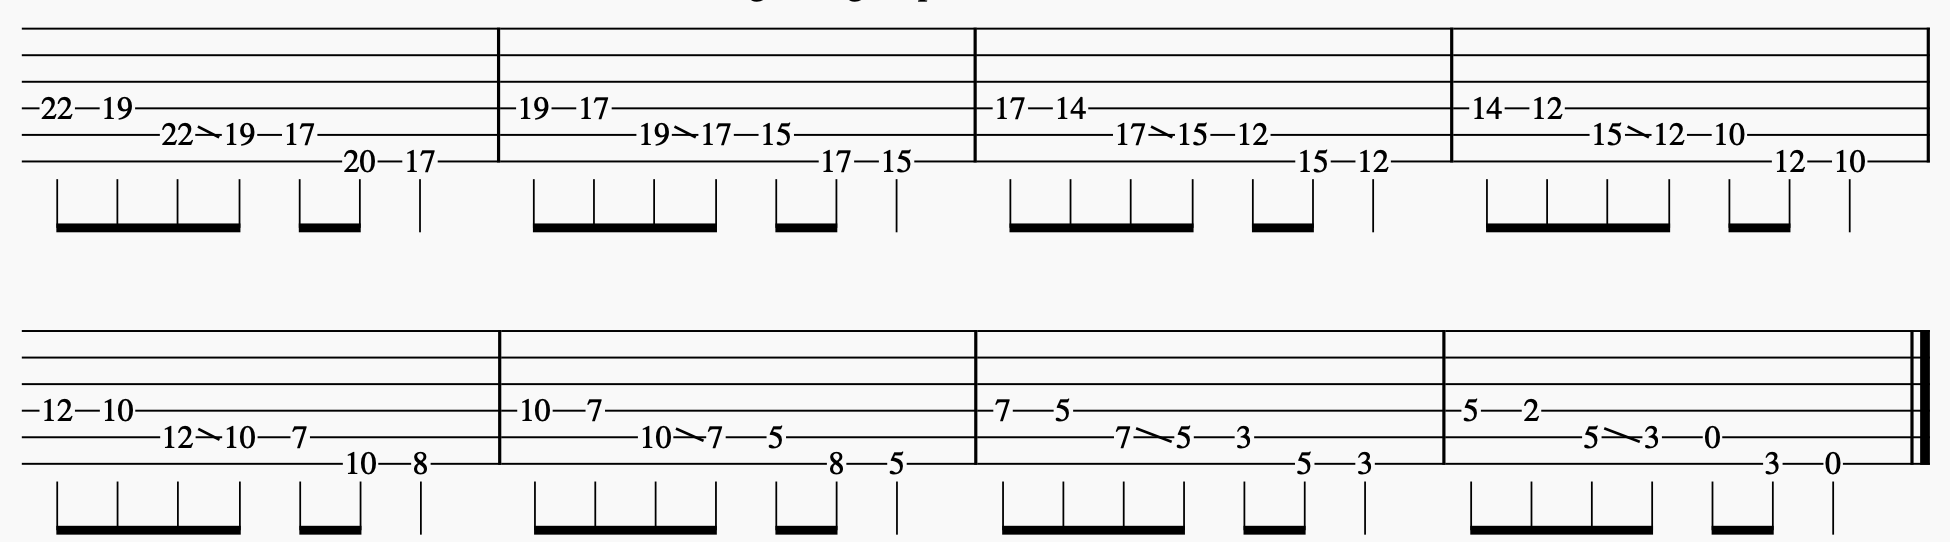
And descending — same notes in reverse, with the slide going down the string:
The ADG String Set
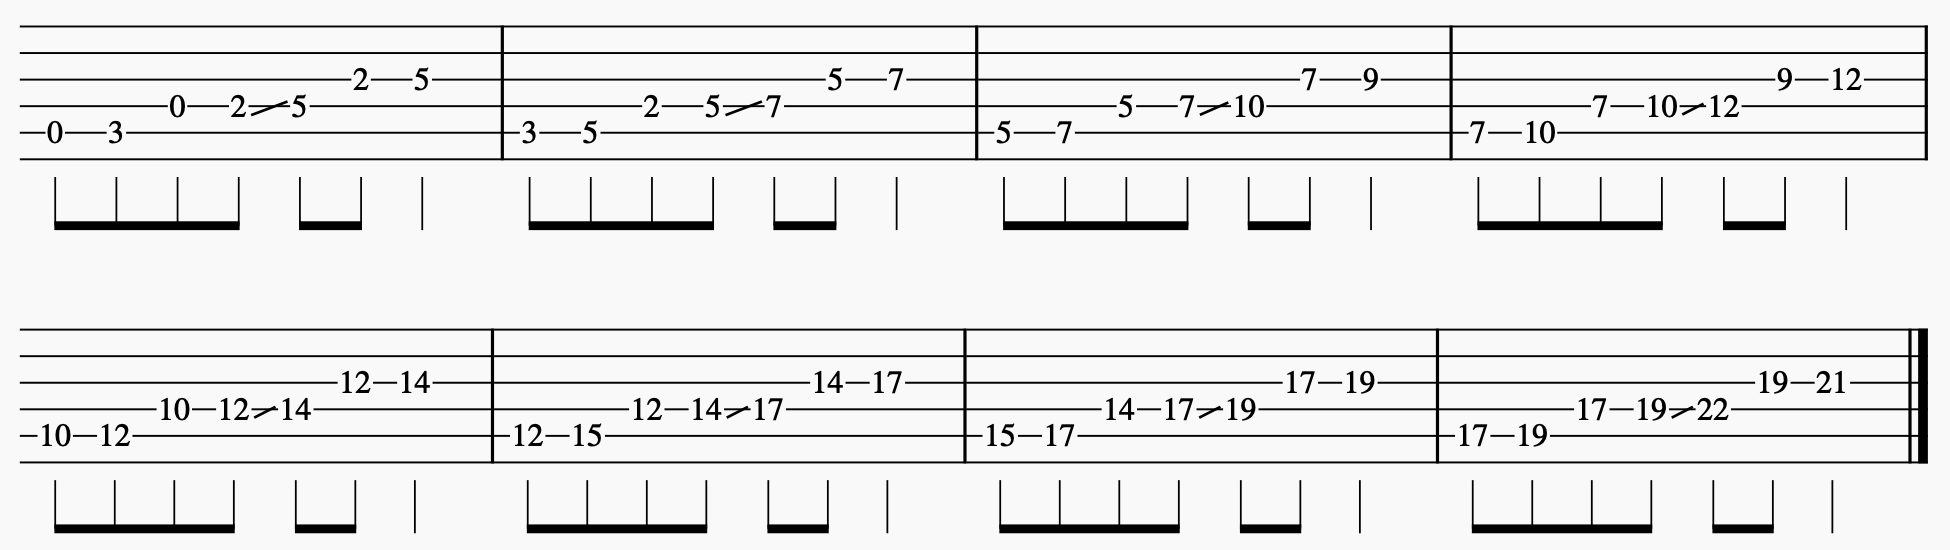
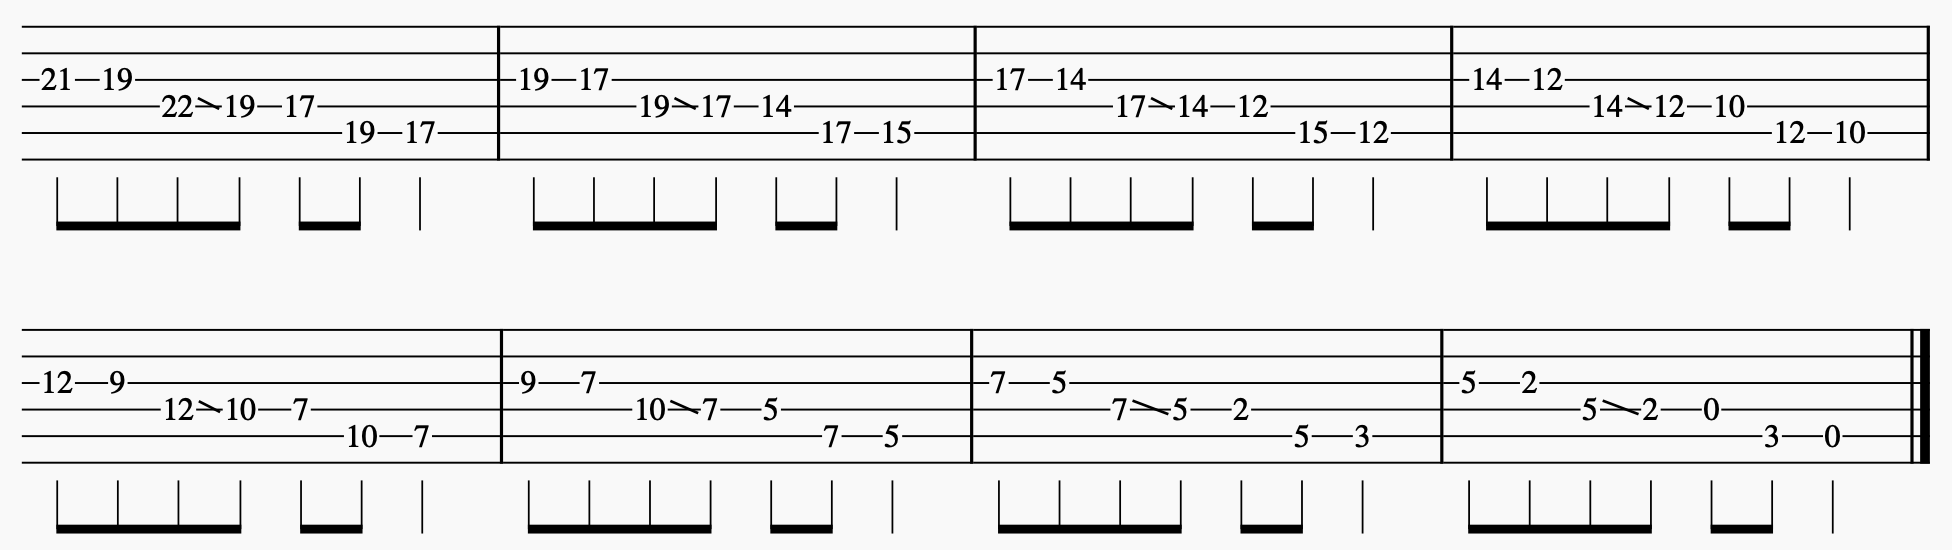
The DGB String Set
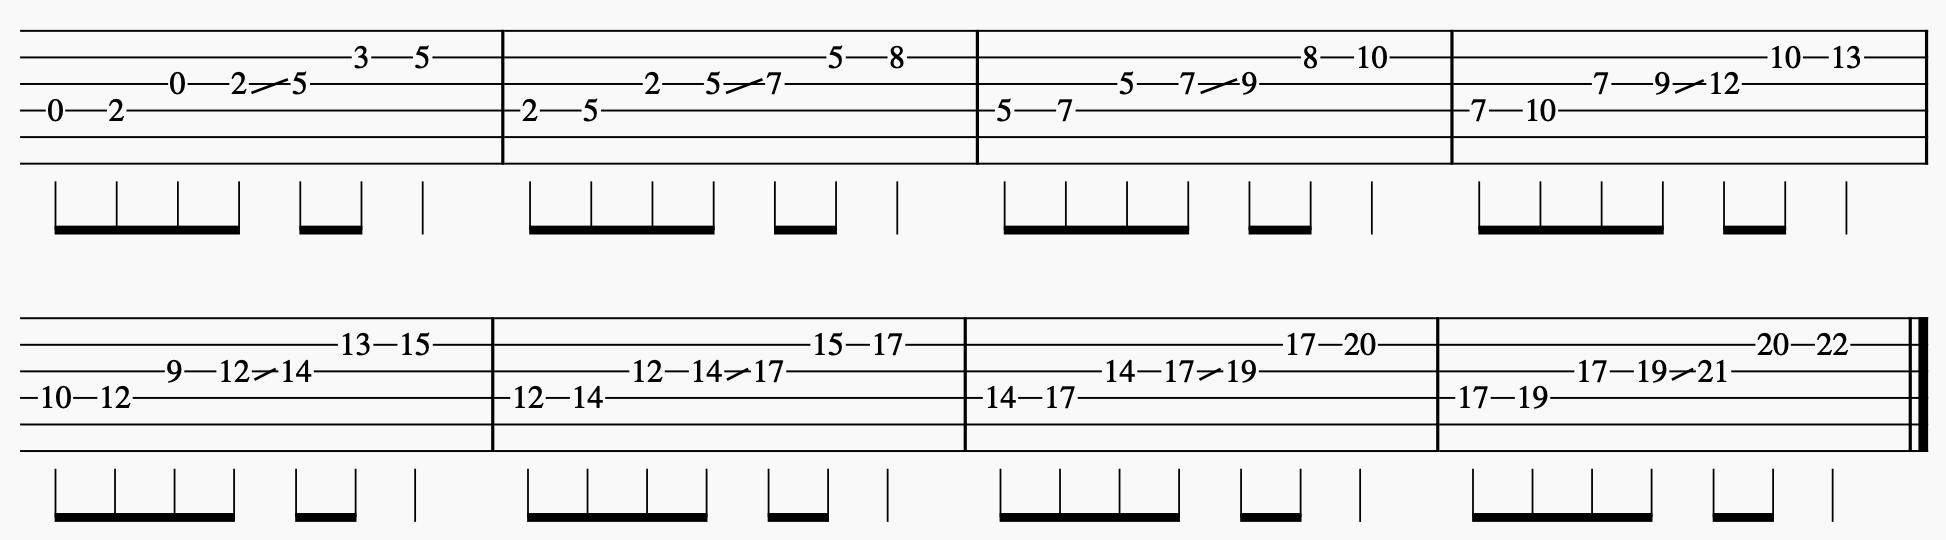
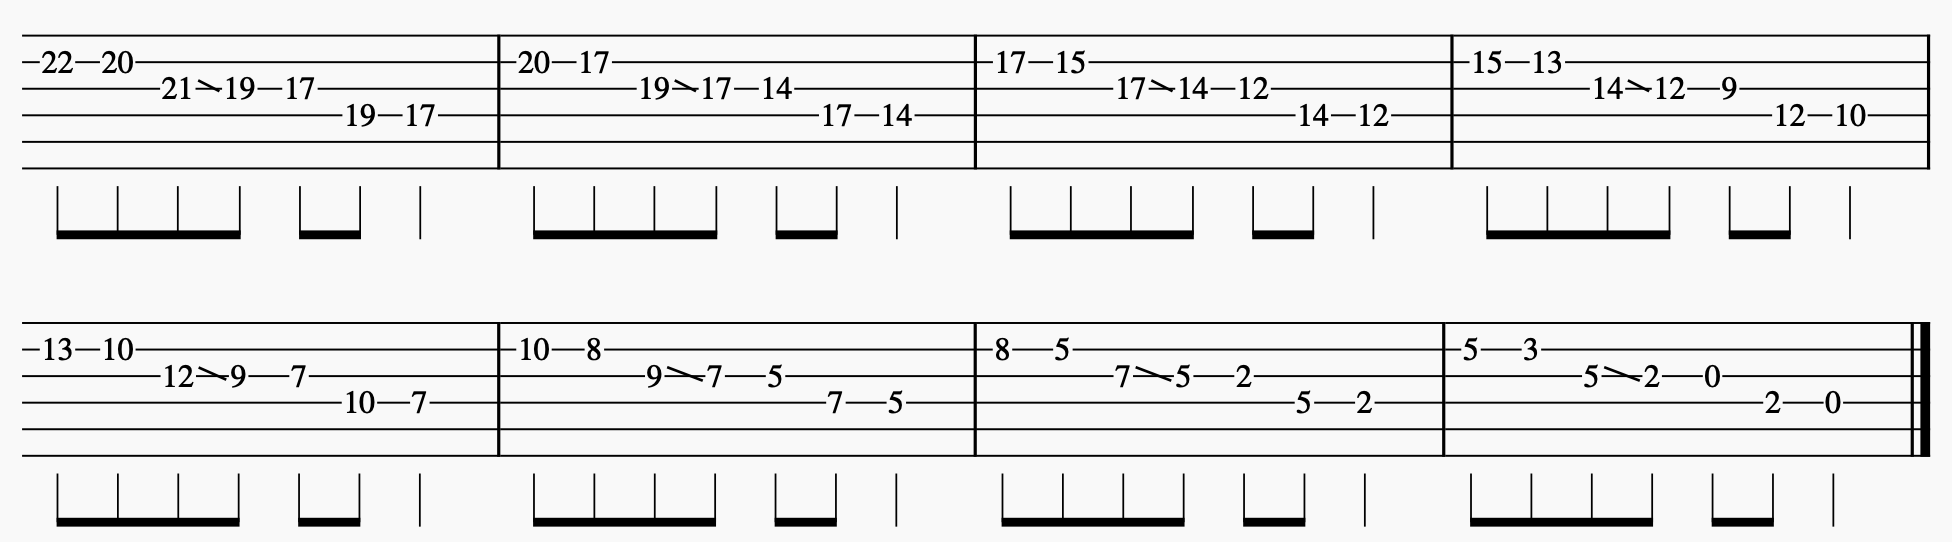
The GBE String Set
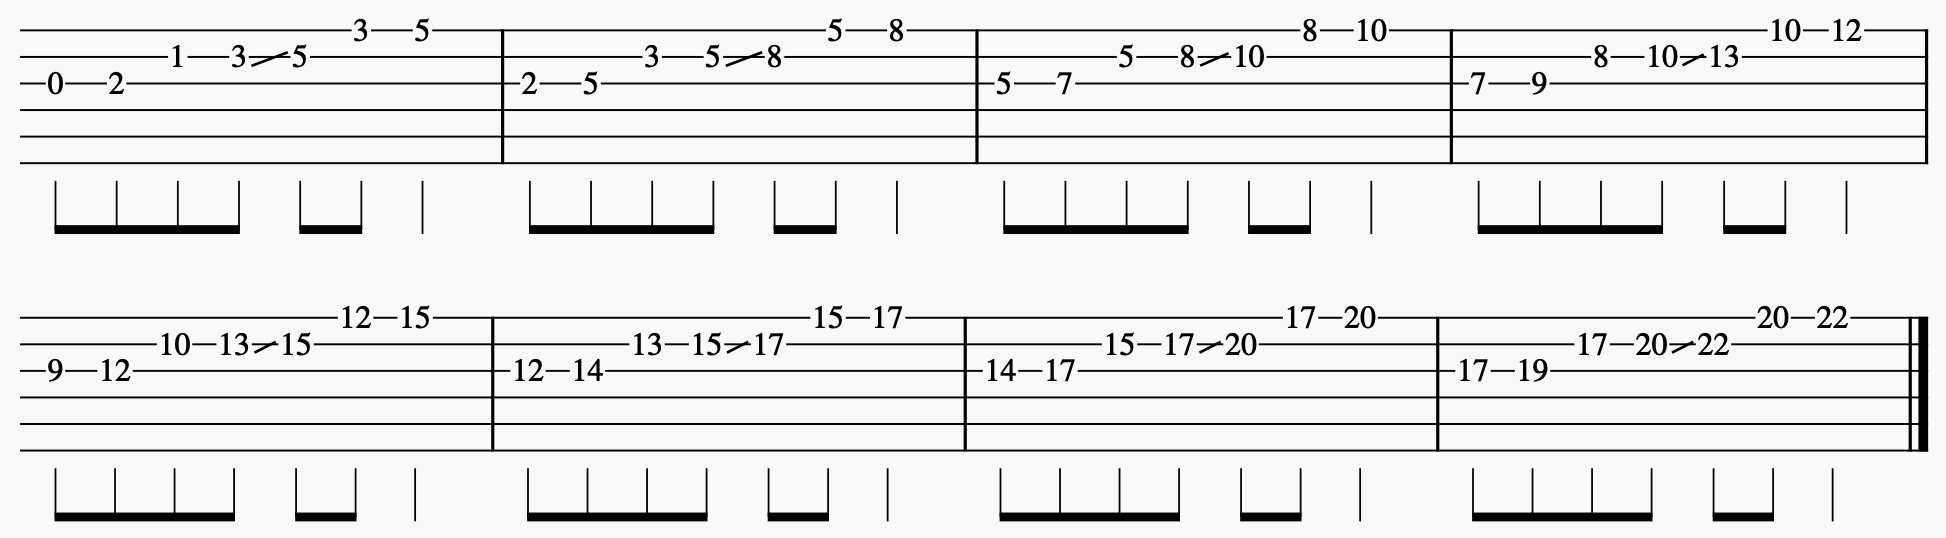
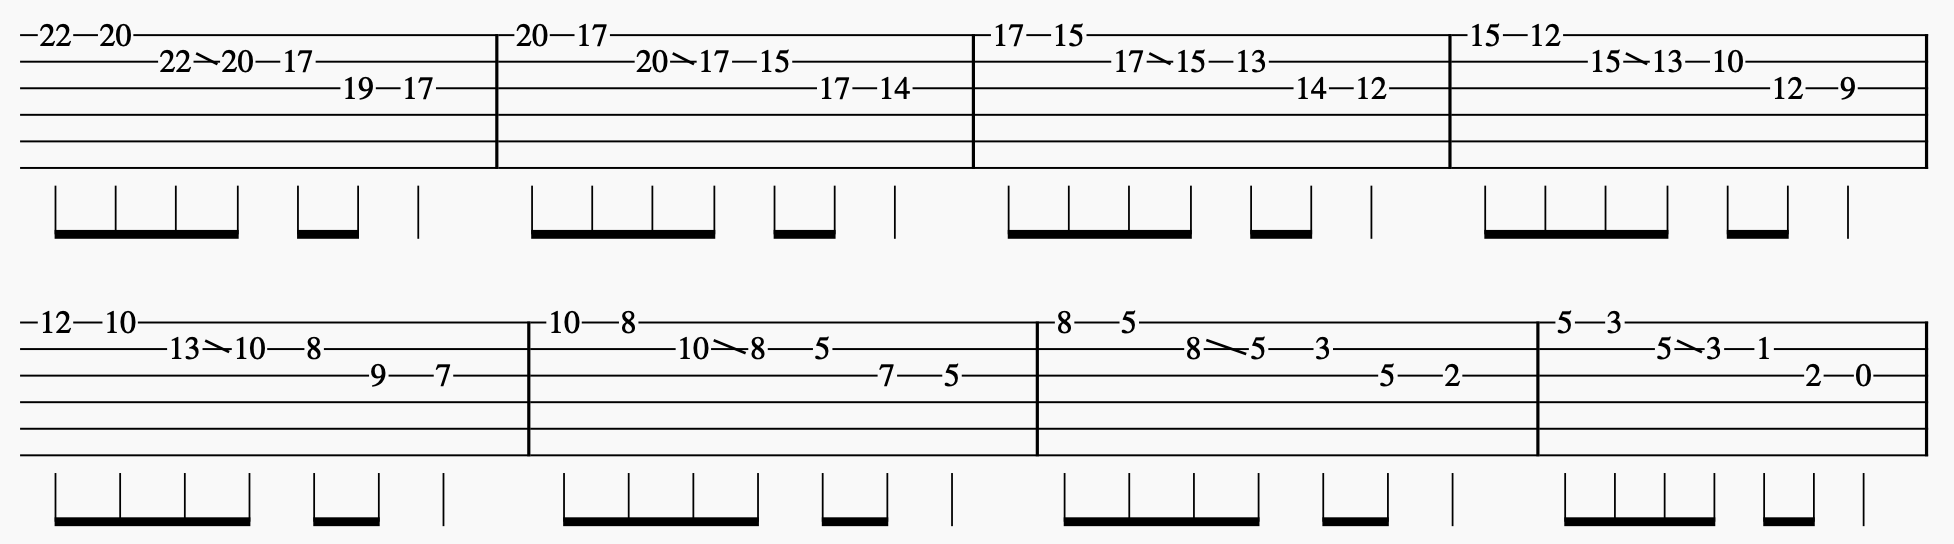
Fingering tip: With all these slides, you'll need to experiment to find what fingers feel comfortable. If a particular bar feels awkward, slow it down and try a few different fingering options. Sometimes you'll find two options that work equally well; other times one fingering is clearly the winner.
Connecting Two Patterns
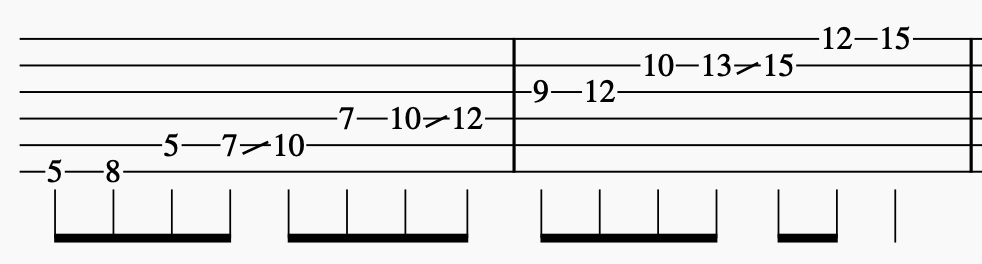
You can join two seven-note patterns together to form one massive run that spans all six strings and travels through four pentatonic positions. Connect a pattern starting on the 6th string (EAD) with one starting on the 3rd string (GBE), adding an extra slide on the 4th string to bridge the gap.
Starting from A, the sequence is:
Notice the two slides — one on the 6th string and one on the 4th string. Each one shifts you into the next position.
Integrating These Ideas Into Your Playing
Patterns are a means to an end. You're not practising them so you can regurgitate them note-for-note in a solo — you're practising them so you have options wherever you find yourself on the fretboard.
A great counter-balance to pattern practice is improvisation. Try using slides as a "theme" for an improvisation over an A minor backing track. Stick to the notes of Am pentatonic and try to use slides as much as possible, covering different areas of the fretboard.
The point isn't to play a "good solo." It's to increase your confidence in knowing where the notes are and to play things you've never played before. Don't be afraid to work a small area, repeat yourself, and sound "bad." You're practising, not performing.
How to Structure Your Practice
Try moving from strict to free across your session:
Take your time with this and have fun. When you're ready, move on to Part 4: The 5 Classic Pentatonic Positions.